How to Change a Toilet Flapper (and Stop That Running Toilet for Good)
A running toilet can waste hundreds of gallons a day. The fix takes 15 minutes and costs less than a coffee. Here's exactly how to do it.
You know the sound. That low hiss from the bathroom that runs for 30 seconds after every flush, or the toilet that randomly starts running at 2am for no reason. You’ve jiggled the handle. It stops for a day. Then it’s back.
That’s a bad flapper. And it’s costing you money — a running toilet can waste 200 gallons a day, which on most water bills adds up to $100 or more per year. The fix is a $6 rubber part and 15 minutes.
What a Flapper Actually Does
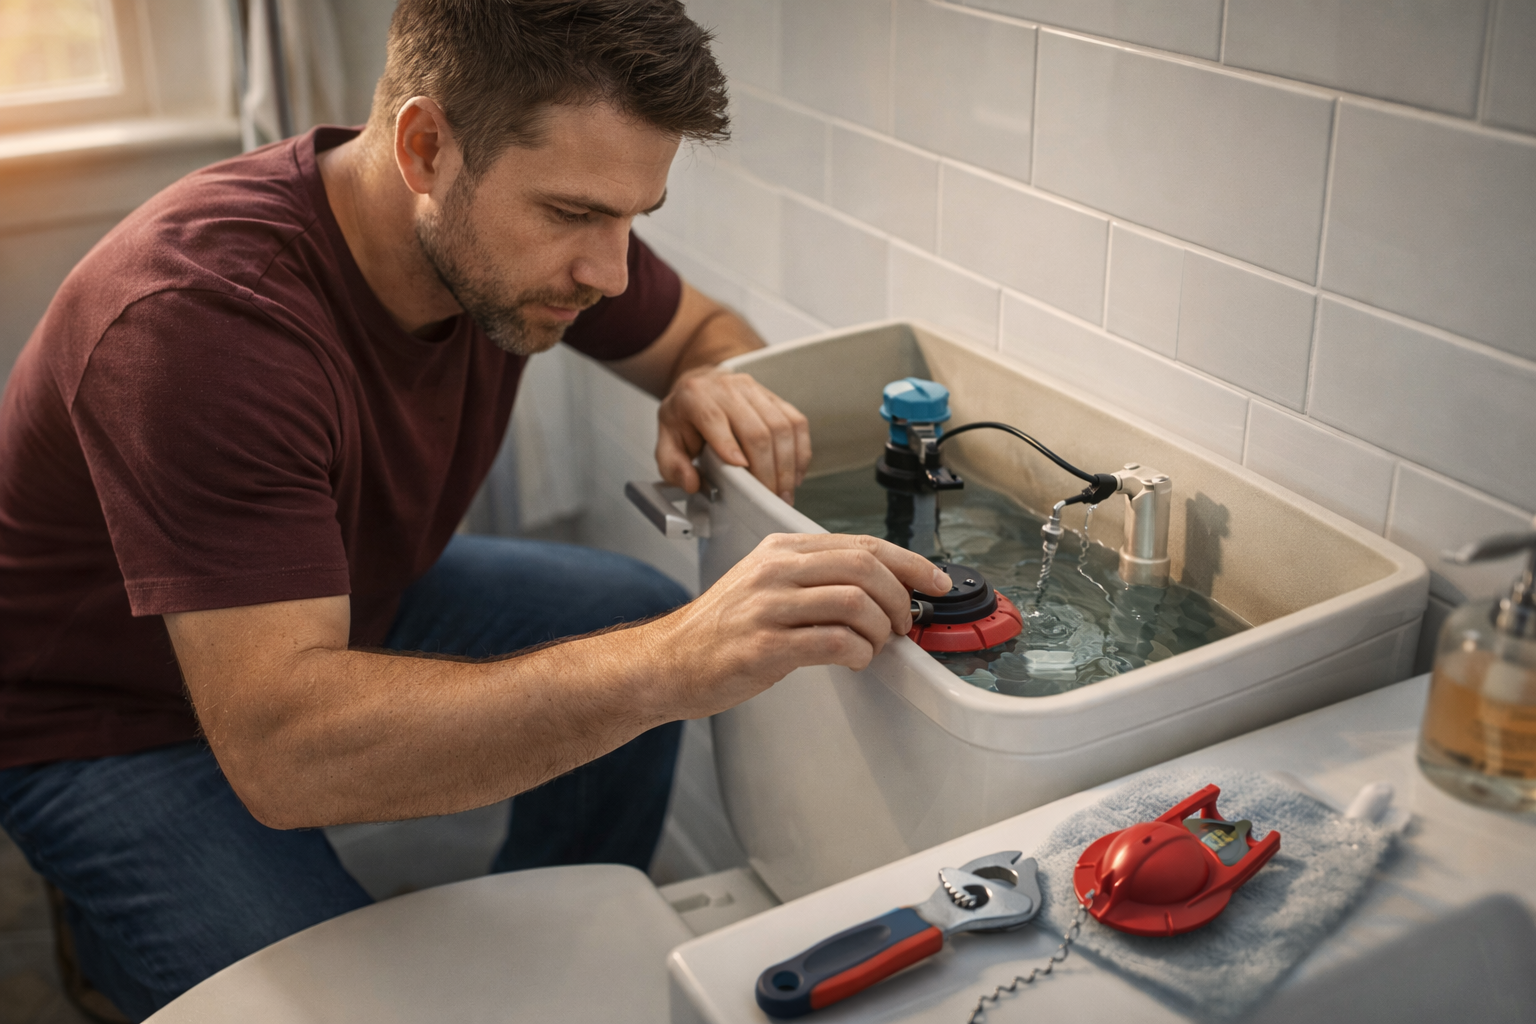
The flapper is the rubber seal at the bottom of your toilet tank — the part that lifts when you flush and lets water rush into the bowl, then drops back down to seal the tank so it can refill. When the rubber warps, cracks, or gets mineral buildup on the seat, it doesn’t seal cleanly. Water trickles through constantly. Your fill valve never fully shuts off.
How to Confirm It’s the Flapper
The dye test takes 30 seconds. Drop a few drops of food coloring (or a dye tablet, often free at hardware stores) into the tank — not the bowl. Wait 10 minutes without flushing. If color shows up in the bowl, water is leaking through the flapper.
The other giveaway: lift the tank lid and push down on the flapper with your finger. If the running stops immediately, there’s your answer.
What You Need
- Replacement flapper (~$5–$10 at any hardware store)
- That’s it
No special tools required. You might want a towel to put on the floor, and gloves if that’s your preference — but the water in the tank is clean.
A note on buying the right flapper: Most toilets use a standard 2-inch flapper. Some higher-efficiency or older toilets use 3-inch. When in doubt, take the old flapper with you to the store. You can also look up your toilet’s model number (usually stamped inside the tank, on the back wall) to find an exact match. Universal flappers work fine on most toilets.
The Fix, Step by Step
1. Shut off the water supply. The shutoff valve is the oval handle on the wall behind and below the toilet. Turn it clockwise until it stops. It should take a few full turns.
2. Flush the toilet. This drains most of the water from the tank. You won’t get it all — there will still be an inch or two in the bottom — but you don’t need to empty it completely.
3. Unhook the old flapper. The flapper has two “ears” that hook onto pegs on the sides of the overflow tube (the tall plastic tube in the middle of the tank). Unhook both sides. Then disconnect the chain from the flush handle arm — it clips onto a hole in the arm, and you just pop it off.
Take a good look at the old flapper before you toss it. Note how the chain was connected and which hole it was using. That detail matters in step 5.
4. Install the new flapper. Hook the ears of the new flapper onto the same pegs. Make sure it sits centered over the drain seat at the bottom of the tank. Press it down and feel it seat flush against the rubber surface — if it’s off-center, it won’t seal.
5. Attach the chain. Connect the chain to the same hole on the flush arm that the old one used. You want just enough slack that the flapper can drop and seal completely when you let go of the handle — about half an inch of slack is right. Too tight, and the flapper won’t seat and the toilet runs constantly. Too loose, and the flapper drops before the tank fully empties and you get a weak flush.
This is the step most people get wrong. Adjust the chain link by link until it feels right.
6. Turn the water back on. Open the shutoff valve counterclockwise until it stops. The tank will refill — this takes about a minute. Listen for the fill valve to shut off completely. If it does, you’re done.
Flush once and watch the flapper drop and seal. Then wait. Listen. No running.
If It’s Still Running
A few things to check:
The flapper isn’t seating flat. Look at the drain seat — the ring the flapper sits on. If there’s mineral scale buildup on it, the flapper can’t seal against it properly. Use a little white vinegar on a rag to clean the seat. Wipe it down and try again.
The chain is still too tight. Even one link too tight is enough to hold the flapper slightly open. Unhook it and move it one link toward the flapper.
It’s not the flapper. If the toilet runs but the dye test comes back clean, the issue is the fill valve, not the flapper — water is flowing into the overflow tube. That’s a slightly bigger job but still DIY-able; the fill valve costs about $10 and replaces in under an hour.
Total Cost and Time
- Cost: $5–$10 for the flapper
- Time: 15 minutes, including cleanup
That’s the whole job. No plumber, no shutoff at the main, no mess. And if you do it once you’ll be able to spot the problem and fix it in five minutes the next time it happens — because it will happen again, eventually. Flappers are rubber, and rubber doesn’t last forever.
Worth knowing: most manufacturers recommend replacing flappers every 3–5 years, even if there’s no obvious problem. Hard water shortens that. It’s a cheap piece of regular maintenance that most people skip until they notice the water bill.

Written by
Chris Bysocki
Dad of two (a 6-year-old daughter and a 3-year-old son), homeowner, and guy who learns most things the hard way. Writing about parenting, tools, yard work, and gear from a neighborhood in the real world.
More in this category

Ask Chris
Got a question about this topic — or anything dad-related? Send it over. I read every one.