Build a Solid Workbench for Under $150
A real workbench changes how you work. Here's a simple, sturdy design any dad can build in a weekend with basic tools — full cut list included.
For two years I worked on a folding table I bought at a warehouse store. It wobbled. It flexed under any real force. Every time I tried to chisel something or drive a stubborn screw, the whole surface shifted and I ended up fighting the table as much as the project. I kept telling myself I’d build a real bench “eventually.”
Eventually finally came on a Saturday in February. I built the whole thing in about six hours for $140 in lumber, and it’s the single best upgrade I’ve made to my garage. A solid workbench isn’t a luxury — it’s the difference between actually finishing projects and abandoning them halfway through.
The Design
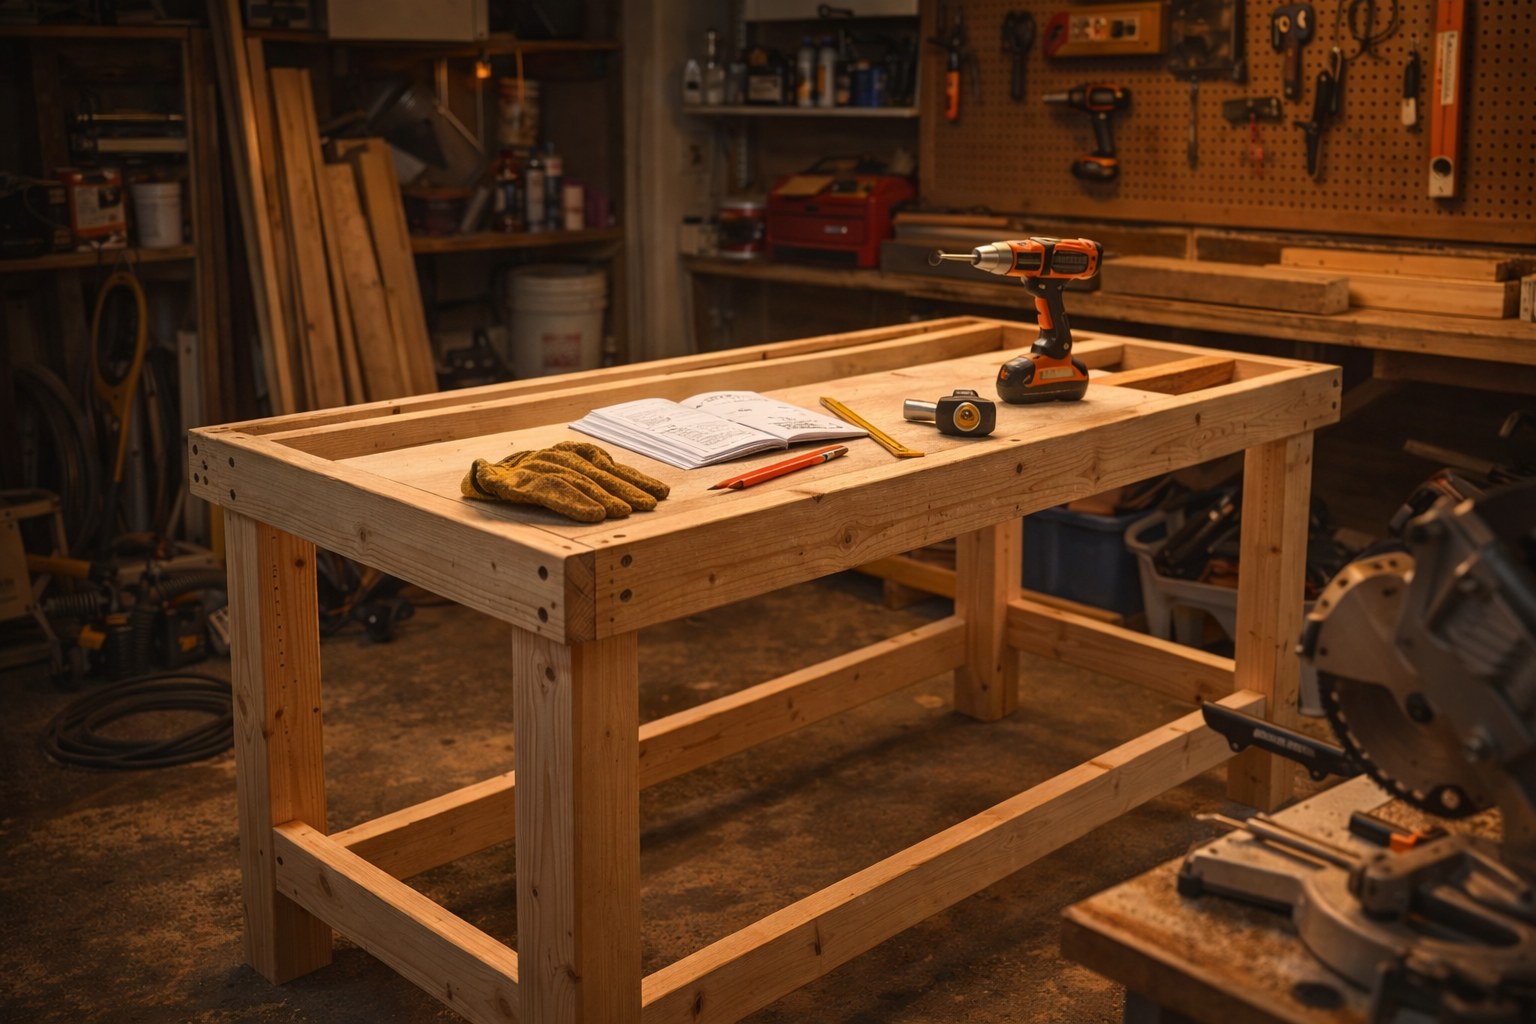
This is a simple 2x4 construction bench: 8 feet long, 24 inches deep, 34 inches tall. That height is standard — roughly the same as a kitchen counter — and works well for most people without hunching or straining. The frame is all construction-grade 2x4s connected with pocket screws and 3-inch construction screws. The top is a full sheet of 3/4-inch plywood. No fancy joinery, no dado cuts, nothing that requires skill you don’t have.
It’s heavy when finished. That’s a feature, not a bug.
What You’ll Need
Tools:
- Circular saw or miter saw
- Drill/driver
- Pocket hole jig (a Kreg R3 is under $25 and pays for itself on the first project)
- Tape measure, square, pencil
- Clamps (at least 2)
Materials:
- 8 studs — 2x4x8 (about $5.50 each at most lumber yards)
- 2 boards — 2x4x10 (for the long front and back rails)
- 1 sheet — 3/4-inch plywood, 4x8
- 2.5-inch pocket screws
- 3-inch construction screws (a box of 50 is plenty)
- Wood glue (optional but recommended for the top)
The Cut List
Before you touch a saw, cut everything to length and label the pieces. It takes 20 minutes and saves a lot of confusion mid-build.
| Part | Material | Length | Qty |
|---|---|---|---|
| Legs | 2x4 | 33.5” | 4 |
| Top stretchers (short) | 2x4 | 21” | 4 |
| Lower shelf stretchers (short) | 2x4 | 21” | 4 |
| Front/back rails (long) | 2x4 | 93” | 4 |
| Top | 3/4” plywood | 24” x 96” | 1 |
| Lower shelf | 3/4” plywood | 22.5” x 93” | 1 (optional) |
Why 33.5-inch legs? The plywood top adds 3/4 inch, putting your finished bench at exactly 34.25 inches — close enough to standard that it works with most vises and won’t wreck your back.
The Build
Step 1: Build the Two End Frames
Start with the two short ends. Each end frame has two legs, a top stretcher, and a lower shelf stretcher.
Drill pocket holes in both ends of each stretcher. Position the top stretcher flush with the top of the legs. Position the lower stretcher about 8 inches off the floor — high enough to sweep under, low enough to hold real weight.
Clamp the pieces, check for square, then drive your pocket screws. Add a construction screw through the outside of the leg into the stretcher for extra rigidity. Build both frames, set them aside.
Step 2: Connect the Frames with Long Rails
Stand both end frames up on their legs, parallel to each other, 93 inches apart (or whatever length works for your space — 8 feet is a common garage wall span).
Drill pocket holes in both ends of all four long rails — two rails at the top (front and back), two at the shelf level (front and back).
Connect the top rails first. Clamp them to the legs, check that everything is level and square, then screw them in. Repeat for the lower rails. At this point you have a complete frame and it should already feel solid.
Step 3: Put the Top On
Set your plywood sheet on top of the frame. It should overhang slightly on the front — about an inch — which keeps you from banging your knuckles on the legs when you’re standing at the bench.
Run a bead of wood glue along the top of the frame before setting the plywood down if you want a bombproof top (the glue isn’t structural, but it eliminates any flex). Drive 1.5-inch screws up through the top rails into the plywood from underneath, spaced every 12 inches. If you prefer screwing through the top face, countersink the holes so they sit flush.
Step 4: Add the Lower Shelf (Optional but Worth It)
Cut the shelf plywood to fit between the lower rails. Drop it in — no fasteners needed unless you want it fixed. It’ll hold an enormous amount of gear and keeps the garage floor underneath clear.
Step 5: Mount It to the Wall
This is the step most people skip and then regret. Find the two studs behind where your bench will sit, drill clearance holes in the back top rail, and drive two 3/8-inch lag bolts into the studs. Snug them up so there’s no play.
A wall-mounted bench does not move. You can lean on it, hammer on it, clamp things to it, and stand on it. An unattached bench eventually walks away from the wall, rocks, and gets in your head when you’re trying to do precise work. Two lag bolts and ten minutes is all it takes.
Upgrades Worth Considering
A strip of pegboard above the bench. Mount a 2-foot-tall sheet of pegboard directly to the wall studs above the bench and you’ve got instant tool storage. Hooks are cheap, the layout is infinitely adjustable, and everything is visible at a glance.
A bench vise. A decent face vise bolts to the front of the bench — add a 2x6 apron board across the front rail first to give the vise something substantial to attach to. A 4-inch cast iron vise runs about $40 and triples what you can do at the bench.
Edge banding on the plywood top. Iron-on edge banding keeps the plywood edges from splintering over time. Takes 15 minutes and the bench looks finished instead of shop-built.
A power strip mounted under the top. Screw a surge-protected power strip to the underside of the bench near the wall end. Every tool that needs a cord has a plug nearby.
How Long Will This Actually Take?
If you’ve pre-cut your lumber (most home centers will cross-cut for free or close to it), the assembly is four to five hours. Add another hour for mounting and cleanup. You can reasonably start at 9 AM and be cleaning your new bench before dinner.
Six hours. $140. No more folding table.
What This Project Costs
$140 total

Written by
Chris Bysocki
Dad of two (a 6-year-old daughter and a 3-year-old son), homeowner, and guy who learns most things the hard way. Writing about parenting, tools, yard work, and gear from a neighborhood in the real world.
More in this category

Ask Chris
Got a question about this topic — or anything dad-related? Send it over. I read every one.